Hi guys :)
My spare time has been occupied with work on GPixMint, my GIMP extension, in the mean time.
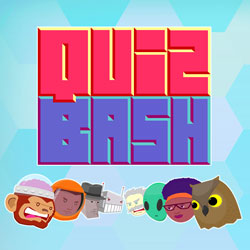
This picture was a successful attempt to work out a quick, effective work flow for creating entire sets of graphics (ideally, the graphics all progress apace, so that you have all the silhouettes complete before you proceed to the color/region blocking out, etc..)
This is a tutorial for the workflow I am adopting as standard.
Some types of pictures require a lot of line-work before silhouetting -- or must be silhouetted with different colors to distinguish visual priority. This is not shown, as IMO it's a fairly simple task (and it doesn't apply here.)
One thing you don't see here is that I'm working in linear RGB now, rather than the usual sRGB that pixellers everywhere use.
The main side effect of this is it makes color picking much easier and more logical.
(http://www.4p8.com/eric.brasseur/gamma.html explains why)
Steps:
1. silhouette. (on an obvious mask color, #ff00ff)
2. block out the structure with flat color
3. replace the mask color with a neutral color, and..
4. Use 'Grain-merge' drawing mode to establish basic shading (this is like darken/lighten mode in ProMotion, except it does both; which, and the amount applied, are dependent on the foreground color you paint with. I painted with #C0C0C0 and #404040, which is equivalent to 'add 64' and 'subtract 64'). Done by scaling my 1-pixel brush up to larger sizes so I drew with a big rectangle:)
5. Tweak the basic colors established -- they were pretty boring, so I used Hue-Sat tool to adjust them for more pop. (i had to first select the pixels with 'by color select'; I'm working on remedying this with a new tool for GPixMint)
6. Add intermediate colors -- Here I just added any extra shades I thought were appropriate, using lowered opacity pencil drawing to put blobs of it on a small area, then adjusting it's color with hue-sat :)
7. Clean any color errors (eg the grey pixel in the midst of the fireball)
8. Use intermediates. Just a lot of hard work here, little to explain.
9. Finish off by optimizing the colors; if there is a visible difference between two colors I want to merge, I replace them with a 50% mix. Otherwise I just replace one color by a similar color.
I reduced 26 -> 24 colors including background.
Color inspiration : Tyrian (http://code.google.com/p/opentyrian/), and
squirrelsquid's 'Havoc Zone' sprites.
We'll call those big bubbly bits energy harvesters, ok?
They're the hittable part of the turret.
:D |


3.5. annotate (on a separate layer) with simple patterns, textures, or other rendering hints.